Pages

Saturday, December 31, 2011

Long Over Due

I think it’s time for me to continue posting stories about my sewing adventures after a long silence. If anyone is wondering, I’ve been MIA for quite some time due to some health issues. Nothing serious, just a minor one ;)

So, emm welcome me back lovelies! I’m still here! Yoohoo!!.. **wavinggg** hehe

And I wanna take this opportunity to wish everyone a very

H.A.P.P.Y N.E.W Y.E.A.R!!

May our new year be blessed..

:)

Monday, June 27, 2011

Skirt Marathon 1

After succeeding in my first attempt with skirt (S is for Skirt), I made 2 more skirts for my lovely friends; an expert photographer  and a successful baker. Both skirts are tiered skirts.


Unfortunately, the skirts were not really a success this time. One is a bit loose at the waist; another is a bit tight at hip. More and more practice needed obviously. My version of tiered skirt is rather boring, don’t you think so? Each skirt was made using the same fabric design. I should try mixing it with at least 2 designs. Hmm, okay will gonna try this again one day.


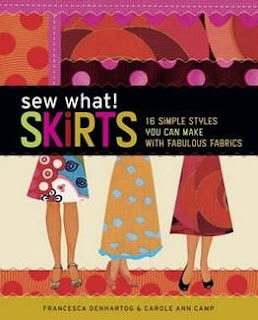
Oh, this is the book that helped me a lot in making these skirts. I love it because:
  •        there’s a guide on how to take measurement
  •        consist lots of explanations on each method featured in the book
  •        you can mix n match i.e. whether you want elastic or zipper waist band
  •        and what’s more interesting is that you don’t have to trace any patterns!!
But I must warn you, if you don’t enjoy reading long-winded, picture-less instructions, you probably would want to try other books ;)


:)


Sunday, June 5, 2011

Craftsy Online Course


I’m currently enrolling in an online sewing course at Craftsy. Already started a few chapters and I do find that this course is great, especially for beginners. If you would like to try an online course, I would recommend this one. It’s in a video format, less reading ;).

**Note that my current resources are only books. I have never attended any sewing class (except for baju kurung – Malay traditional costume). So, I guess this course is very useful for me as I wanted to learn the right way instead of just making assumptions on how things are sewn.

I’m taking Sewing Studio: Fashion Fitting, Home Decor & More - an online course available on Sympoz. If you feel that this course would help you and want to enroll, use the following link. I was able to get you a special discount of 50% off:


---
About Sewing Studio: Fashion Fitting, Home Decor & More:
Increase your sewing savvy with fit and finishing techniques from Diana Rupp of Make Workshop. In Sewing Studio, she'll walk you through two classic patterns - an Envelope Pillow and Naughty Secretary Skirt - using methods you'll use again and again. Watch step-by-step tutorials on zipper insertion, lining a skirt, adding darts, finishing with French seams and much more. 
---


Tuesday, May 17, 2011

Sewing Room Under Construction

Hi lovelies,

A little mess in my sewing room right now so you'll be seeing no progress this month. Can't really work properly in a messy environment :(.. Will update once this is over.

Thursday, April 14, 2011

No Sew

Yup, no machine/threads/needles needed. Only fabric remnant; big enough to cover your old boring-looking tray, paint & brush and mod podge as adhesive/sealer.


hmmm.. no mod podge in this pic (matte-mat-mate)

The steps are pretty simple for this. I bet you can figure out what needs to be done.


First, I painted the tray black to match the drawing lines on the fabric, leaving the white base as-is. After the paint dried, measure, cut and iron the fabric. **Added 1/4" to all edges so I could fold them to hide frays.
Then, using mod podge, glue the fabric onto the tray and seal. Done ;)

TaDaa!

Monday, March 28, 2011

Worth A Visit

Hey lovelies,

Just wanted to share some interesting links I have in my list. Very inspiring!!

modernparentsmessykids
knockofwood
apartmenttherapy

**I know I shouldn’t be using ‘busy’ as an excuse for not sewing much this month but seriously, I’ve been snowed under with office work. March is always the busiest month every year. Don’t spank me please! *run & hide*


|>__<|

Tuesday, March 8, 2011

Zippered Pillowcase Tutorial

As promised, here's the tutorial :)
(kindly let me now if you have problems with the instructions)


You will need:
- 3 pieces of fabrics, measurement as shown in picture
- a 20" zipper
- sewing tools of course

{ 1 }

First, iron your fabric to get any creases or wrinkles out.

Have the shortest edge of fabric A on the horizontal, wrong side up. Measure 1.5” and fold to make a hem. Press the hem.


{ 2 }


Line up the zipper teeth with the folded hem of fabric A (but not too close to the zipper teeth).

Pin them together.


{ 3 }

Using the zipper foot, top stitch the fabric.

{ 4 }

Line fabric B (wrong side up) with the zipper, leaving 1” gap between the fabric edge and zipper teeth.

{ 5 }

Pin them together and sew a straight stitch (again, not too close to the teeth). This will be a bit tricky as you can’t see the zipper.. so, you have to do it carefully.

{ 6 }

Okay, with both fabric A & B facing up, it will look like this.

{ 7 }

Now, we want to make a flap to cover the zipper.

Take about 0.5” of fabric B (starting from the seam made in step 6). Fold and place it on top of the zipper.

Now you see it, now you don't.


{ 8 }

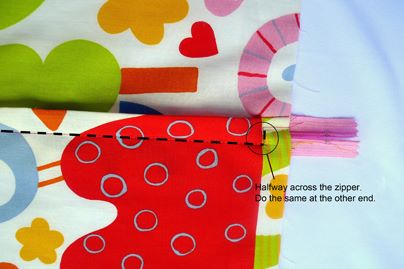
We need to secure the flap by stitching a straight line along and halfway across the zipper (like a C shape).
So, it will stay folded. Otherwise, it won’t be able to hide the zipper properly (don’t believe me? you can skip this step :P).

**Make sure your zipper pull is within the stitching range before you sew.

The zipper is now hidden underneath the flap. Yeay.. you’re almost there..

{ 9 }

Open the zipper halfway. Place fabric (A+B) and fabric C right side together. Trim off any excess  and pin.

Stitch around the big square with 0.5” seam allowance.

**I did this part using my overlock machine.

{ 10 }

Trim/snip the corner. Turn the fabric right side out through the zipper opening. Push out the corner using a chopstick or brush tip.

Insert your pillow.

Ta-Da!! You did it! Give yourself a pat on the back :D

T.H.E   H.A.P.P.Y   F.A.C.E.S


The End
Happy Sewing!!

Tuesday, March 1, 2011

On Hiatus

Hi lovelies,

I'm going on hiatus for a few days. Admitted to hospital due to lung infections.
Not so serious but need a prompt treatment. You girls pls be careful and take care of your health (especially those with asthma). A lot of this kind of cases happening here. Mmg musim doctor ckp..

So, see you soon.

"I'll be back"

xoxo,
Syaf

Wednesday, February 23, 2011

Crafty Art Market

**The zipper tutorial (as mentioned in previous post) will be delayed and posted after this one yeah, sorry :x


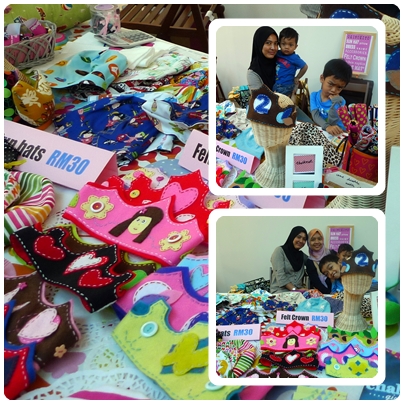
Despite busy schedule last weekend, I managed to visit a craft market for the first time, yeehar!! The event, Crafty Art Market was held at Jaya One PJ – the right location at the right time as I needed to go to CakeConnection to check on some baking stuffs as well. 2 in 1 :)

The weather was pretty hot but I didn’t mind at all. It was fun! I get to browse through a lot of interesting items from creative sellers. I kept reminding myself to only buy what is needed. Lucky I didn’t have time to go to the teller machine so I bought only 1 (phewh!) small knitted cotton fabric from loveandcraft. Visited my friend's Mai Okinokiyo booth. The sun hats were cute! But no size for my boys.. The dresses were lovely but no size for my lil niece also :(.. Maybe I was destined to spend only rm10 that day huhu..

A couple of pictures taken during the visit.. I should have taken more.. terlupa sbb syok sgt tgk keliling hihi.. you can visit Okinokiyo’s site for more pictures.


Next event will be Handmade Market and Supplies Bazaar:

Handmade Market
Venue: Empire Shopping Gallery
Date: 5th March 2011
Time: 1pm – 10pm

Supplies Bazaar
Venue: Bfree Sunway Dataran Mentari
Date: 2nd April 2011
Time: 12pm -7pm

I’m now a craft bazaar addict!
See you there! (as though i'll be setting my own booth ahah)

Tuesday, February 8, 2011

Something for the little chef

I made 2 items for my friend’s daughter.

[1] Apron
Is a must. So her mommy dearest yulie bakes the cake (head chef hehe) would have chances wearing her own apron :).. Besides, wearing inappropriate size can be harmful.. I mean can cause kitchen accident lah if the size is too big :P

This is my first apron project. No pattern needed as it is very basic.. Just need a little teeny weeny bit of thinking since it is reversible (you can do it too, trust me and believe in yourself ;)). Measurement taken directly from my little model’s body.


The apron with Dora the Explorer design. Hope she likes it.

[2] Zippered pillow case
Pulling the pillow out of its case is one of her favourite things to do, I was told. Smelling the ‘bantal busuk’ directly makes her calm I guess.. right? (eh, do not disagree with me. I’m sure you once - or still - have 'bantal busuk' as well ahah! There, there I can see you smiling :P) Anyway, I hope by adding the zipper would at least stop her from having that idea again.

Oh nos.. I didn’t snap the pillowcase pic before I sent. Never mind, I will post a tutorial on how to attach the zipper in my next post and show you the final result of course.

Last but not least, for the mommy dearest.. happy belated birthday yulie muahs

Thursday, January 13, 2011

Is that an airplane's pipe?


Okay, this is not one of the missing parts from the recent airasia crash incident hehe..
But this thing can be turned into something really useful for your bobbins. You just need only RM1 to get 3 sets of bobbin organizer. Cool isn’t it?


And all you need is a pipe, as shown above (I don’t know what they usually called it here but it looks like a pipe to me ;)).. You can find this at your nearest hardware shop. Just ask them for clear pipe tubing. There are a few sizes, choose the one that can fit the bobbins (judging by eye only of course).

Thanks to Sassycrafter (visit her blog for instructions) for this brilliant idea :)..


Wednesday, January 5, 2011

Craft In My Mailbox

I’ve never joined any craft swap before so this was my first time. Thrilled and excited? You bet. I nearly jump when Zura’s email appearing in my inbox haha! She was the organizer of the SewRetroChic Craft Swap (Thanks Kak Zura!). Nervously, i clicked it open. It’s a list of craft swap participants. I had to read it twice in order to understand how it works hehe.. Okay, so NeezaNeedles will sew something for me, while I had to sew for MarieLadycino. Weehoo!

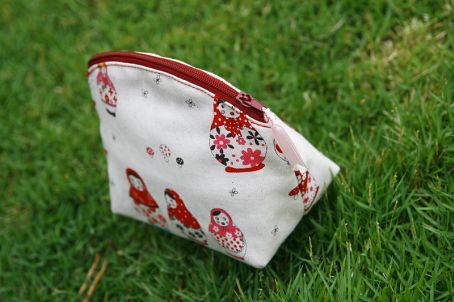
I was having a hard time deciding what to sew for Marie. I sat for like 30 mins imagining the end product of various sewing projects.. yah, I wasn’t doing anything.. just imagining. Boy, i'm good at this hahah.. finally, I made this make-up bag. check her blog :)

marie_swap


And today.. today something interesting has happily entered my mailbox and waiting for me to pick her up hehe

sketch

Drum roll please..
*
*
*

It’s a gift from Neeza!! A wallet!!! Weeeeee!! This is awesome! I've been planning to sew myself a wallet a few weeks ago and now *poof*.. it's in my hand, nicely done! hehehe.. Thanks Neeza! Like it sooo muchhh :D.. check her blog :) One item in my sewing project list can be marked completed by Neeza's creative hands, yeay!

neeza_swap

Now.. where's the project list?!

Saturday, January 1, 2011

This Year I Will..

kids_bag
moninavelarde


Yeap, that’s right.
No more procrastination.
No more excuses.
I will sew more.
Spank me if I don’t.


HAPPY NEW YEAR !!


&&&
[^_^]